Hey there Arties! Del here with a fall themed greeting card that includes subtle details to add interest to your design! I will use some of the add-ons from the September My Monthly Hero release. If you are a kit subscriber, you can purchase these items by 11:59pm Pacific tonight, September 10 to get them shipped free with your kit!

Project: A Die Cut Window Card
To create this card you’ll need:
Instructions:
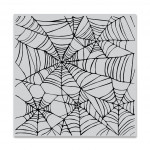
First, I stamped the Spider Web Bold Prints image onto some Pitch Black Cardstock with Versamark (clear embossing ink).
Then, I melted some Clear Embossing Powder over the image with a heat tool.
SPECIAL DETAIL: This step adds interest to the project with its subtle shine as you tilt it in the light. It actually looks like a spider web’s silk.

Next, die cut a window out of the center with a die from the Rounded Rectangle Infinity Dies Set. (any die set would work for this.
I also trimmed down the embossed panel to 3 7/8” x 5 1/8” to leave a thicker tone on tone border around the center panel.
SPECIAL DETAIL. This tone on tone look adds subtle interest to the composition of the card with a bit of dimension and shadow under the center panel.
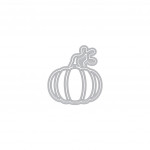
Then, die cut the Pumpkin Window Die five times, once out of Pitch Black, once out of Dove and three times out of Payapa Cardstock.
After that, stack the pieces with precision glue! I colored the stem in with an Marine Gren YG99 Copic Marker. I also added brown marker to the pumpkin skin—E99, E95 & E93.
SPECIAL DETAIL: Add extra pieces of orange cardstock onto the insides of the pumpkin so that they are thicker than the outline. This gives the appearance of dimension to the pumpkin.

I die cut a piece of Dove cardstock a little larger than the window and brushed on some Blue Hawaii Reactive in a gradient from top to bottom.
Next, I adhered the blue background to a 4.25'“ x 5.5” Pitch Black card panel.
Then, i popped up the heat embossed window panel over it with foam tape.
After that, I adhered the pumpkin to the bottom left of the window panel.
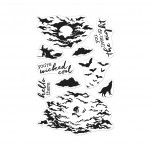
Then, I stamped the sentiment from the Layering Moonlit Night Stamp Set onto the blue gradient background with Intensified Black Ink.
To finish off the card, I adhered it all to the front of an A2-sized Dove card base with Hero Arts Precision Glue

I hope you have enjoyed this release and this add-ons project. If you have been inspired to shop for these supplies, please consider using the affiliate links in the grid below. I will received a small portion of the sale at no additional cost to you.
Thank you for joining me today!

|